Looking to convert Apple Music to WAV for a permanent collection, only to find that Apple Music doesn’t offer a direct download option? You’re not alone, this is a common issue. Although Apple Music offers high-quality audio, songs are limited to playback within the Apple Music app and cannot be exported as WAV or any other lossless format. In this guide, we’ll introduce the best Apple Music to WAV Converter in 2026 and show you how to convert Apple Music to WAV quickly and easily without losing audio quality.
If you’re seeking a simple, reliable way to download Apple Music songs as WAV files, Sidify Apple Music Converter is a recommended option. This software lets you to easily convert songs, albums, and playlists from Apple Music into WAV, MP3, FLAC, ALAC, AAC, and AIFF formats. It maintains the original audio quality and keeps all ID3 tags. The tool features a user-friendly workflow, faster speeds, and batch conversion support, making it a great choice for users who want to enjoy Apple Music on more devices, store songs offline permanently, or use them in professional audio editing. Whether you’re a music lover, DJ, or casual listener, It offers a reliable, high-quality Apple Music conversion experience.
 850,000+ Downloads
850,000+ Downloads
850,000+ Downloads
Apple Music does not allow users to download WAV files directly. Most tracks are encoded in AAC, which is primarily designed for streaming and offline listening within the Apple Music app. As a result, even when songs are downloaded for offline use, they cannot be exported as WAV files.
For users who want high-quality playback, audio editing, DJ mixing, and long-term local storage, WAV offers superior compatibility and preserves more audio detail. That’s why more and more users are seeking a simple, reliable way to convert Apple Music to WAV losslessly.
In this situation, using a professional audio converter like Apple Music Converter offers a more practical solution. It allows users to convert Apple Music tracks to WAV while preserving the original audio quality and song metadata as much as possible, making local management and cross-device use much more convenient.
850,000+ Downloads
850,000+ Downloads
Sidify Apple Music Converter offers a range of powerful features and advantages. Its interface is user-friendly. Next, we will show you the step-by-step process of converting Apple Music to WAV format with it.
Step 1Launch Sidify Apple Music Converter.
Run the software on your PC or Mac, you will access the modern interface of the program.
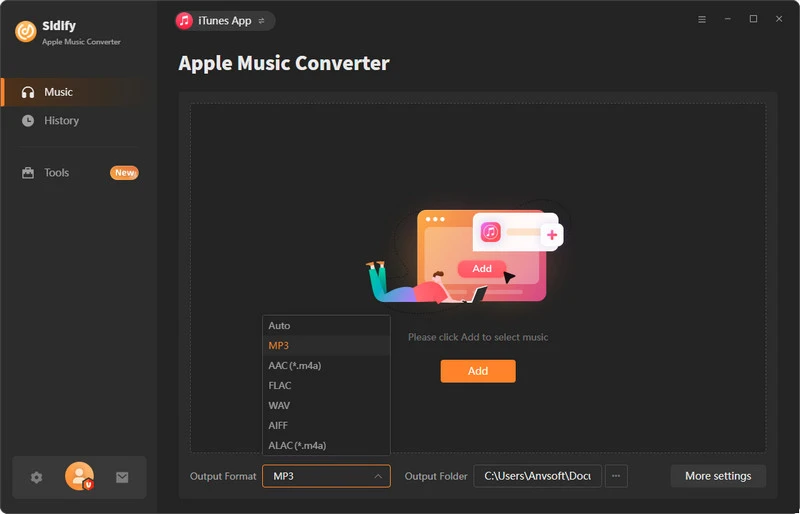
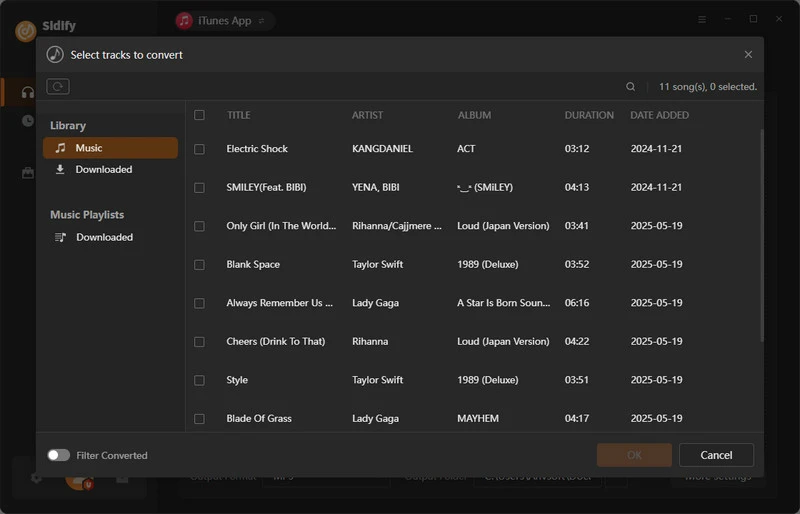
Step 2Add Apple Music Tracks You Want to Convert.
Drag and drop songs, an album or a playlist from Apple Muisc to Sidify. Or you can click the "Add" button on the interface and copy & paste the URL of your Apple Muisc to the program. Then click the "OK" button.
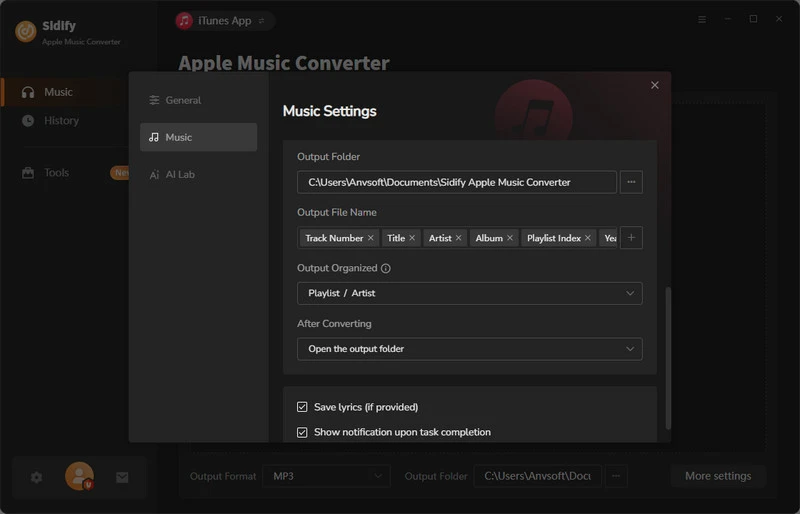
Step 3 Choose Output Format and Customize Output Path.
Click the "Settings" icon in the left panel. Choose WAV as the output format , and setting the output quality and the output path as well. Besides, you can customize how you'd like to name and sort out the converted files.
Step 4 Convert Apple Music to WAV.
Click the Convert button, and it will immediately start converting Apple Music to WAVs.
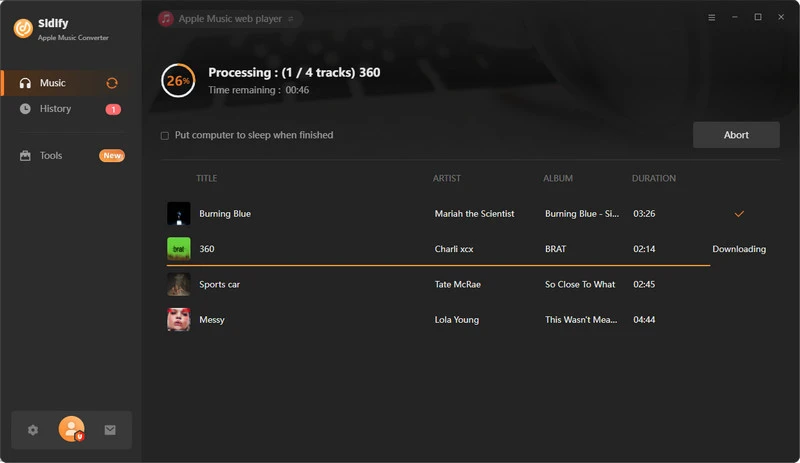
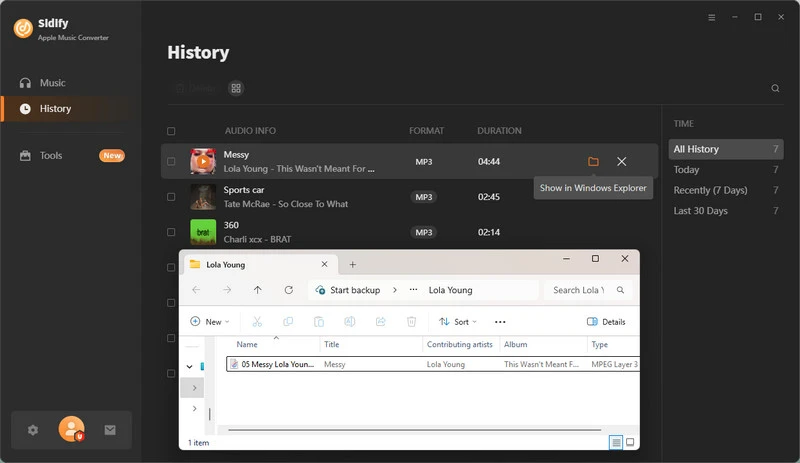
Step 5 Find the WAV downloads on the Local Drive.
Once the conversion is complete, click the “History” tab to see all Apple Music tracks that have been converted successfully. Go to the output folder set in the previous step. You’ll find the downloaded WAVs there.
If you’re seeking a completely free method to convert Apple Music to WAV format, several options remain, including online audio converters. However, be aware that these free tools often have format limitations or limited features.
In this section, we will introduce a free tool, APLMate. It is simple to use and completely free. However, it is worth noting that APLMate only supports MP3 output and does not support direct export of lossless WAV files.
But don’t worry. Sidify includes a built-in free utility that lets you convert MP3 files to WAV format at no extra cost. The detailed steps are as follows:

Note: Online websites can be unreliable and may contain misleading links or ads. To ensure safety, please avoid clicking on unfamiliar or suspicious links and prefer trusted, reputable platforms.
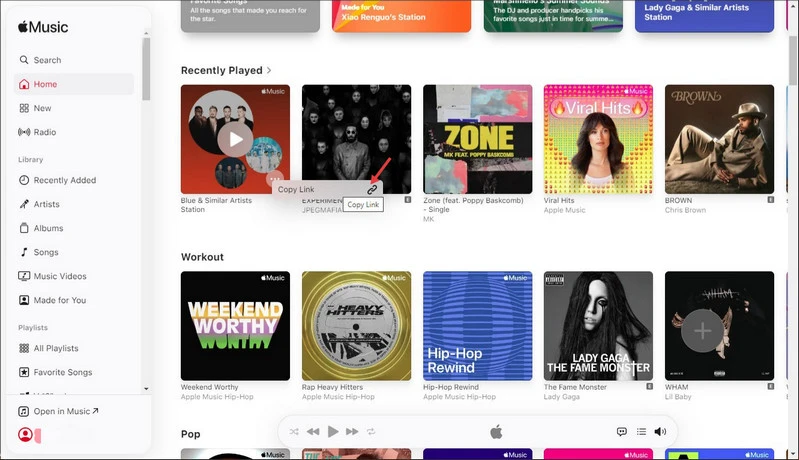
Step 1Launch Apple Music and copy the link of the track you wish to download.
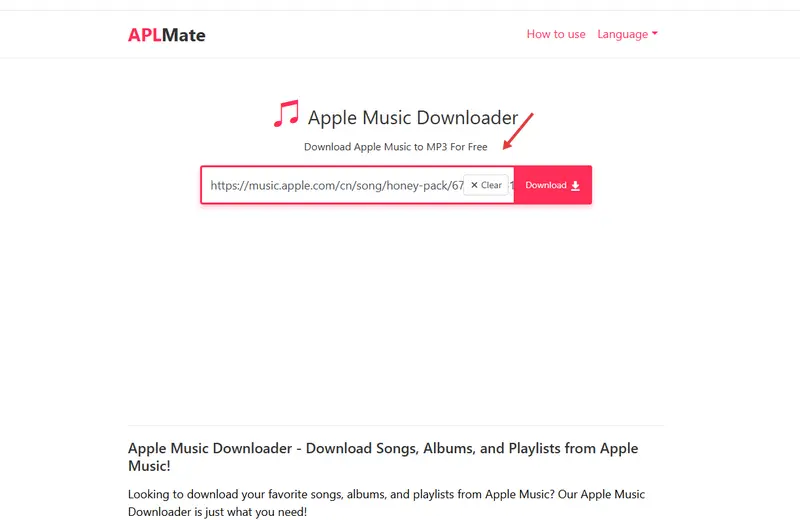
Step 2Open the APLMate website and paste the track link into the search box, then click “Download” button.
Step 3 Choose “Download MP3”.
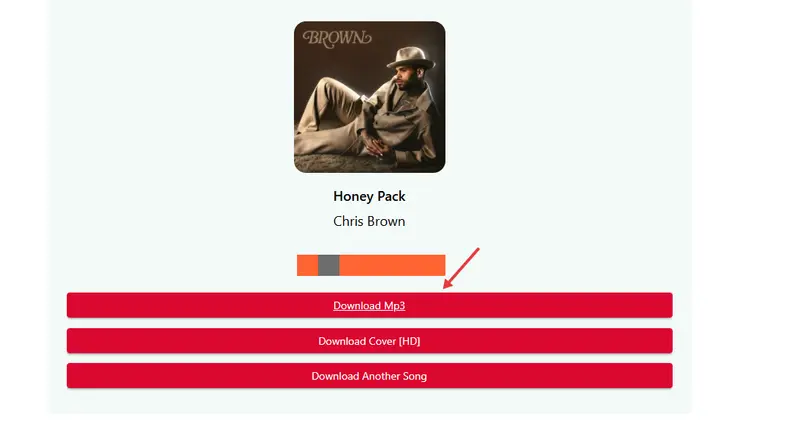
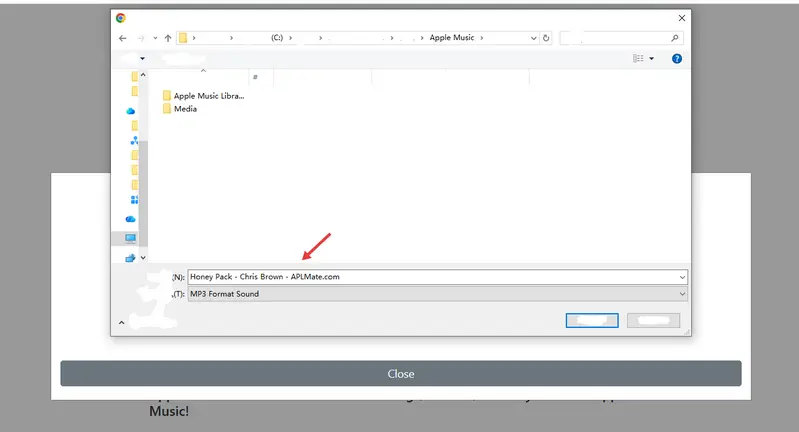
Step 4 Save the song to the output folder of your choice.
 850,000+ Downloads
850,000+ Downloads
850,000+ Downloads
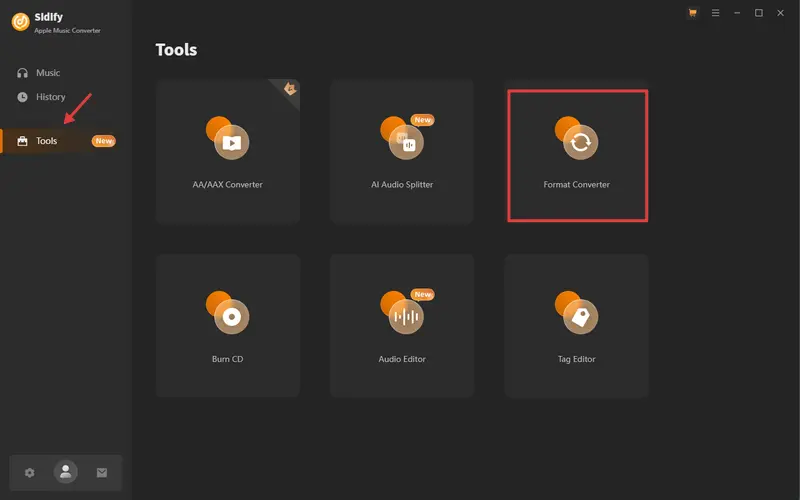
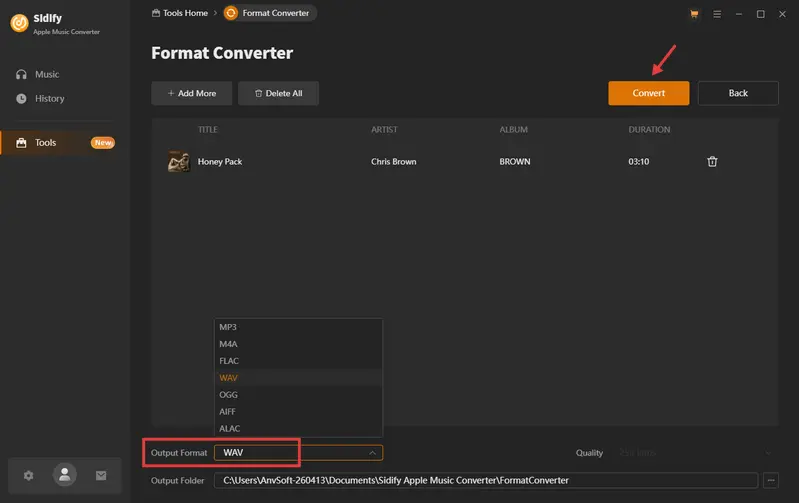
Step 1Open Sidify Apple Music Converter, go to the left-side toolbar, and select “Tools”, then choose “Format Convert”.
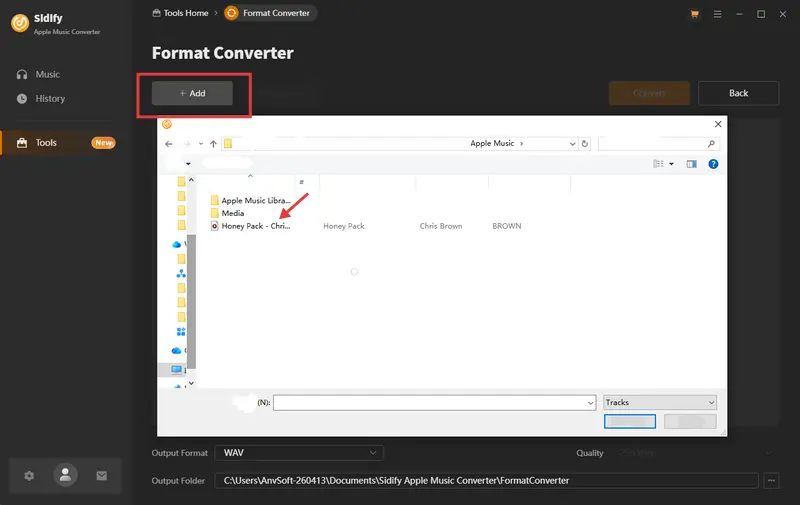
Step 2Click the "Add" button to add the song you want to convert from MP3 format.
Step 3 Select WAV as the output format, choose output folder, and click “Convert” to begin.
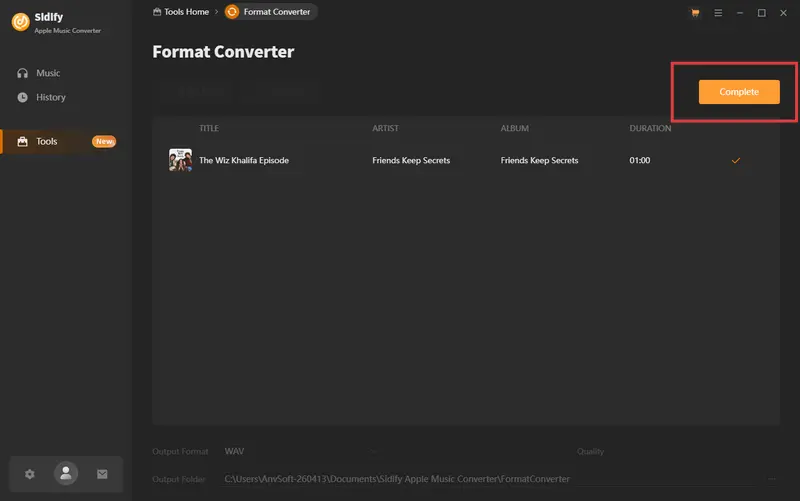
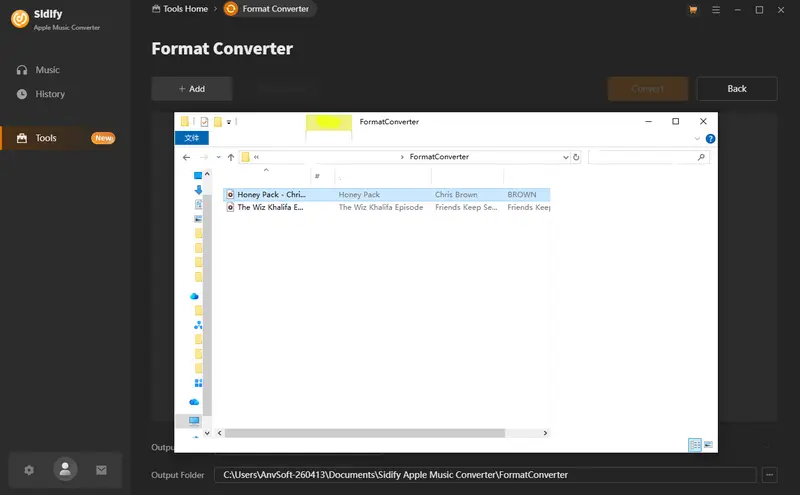
Step 4 Click the “Complete” button, and the output folder will pop up. You can then find your converted songs there and enjoy them.
In this article, we introduced two ways to convert Apple Music to WAV, including free online tools and Apple Music to WAV converter. The method you choose ultimately depends on your needs. If you only need a simple and free option for occasional use, online tools may be sufficient. However, if you want better audio quality, faster conversion speed, and more stable batch conversion performance, Sidify is a more reliable choice.
Apple Music does not provide a direct option to download songs in WAV format. If you want to convert Apple Music to WAV for free, you usually need to use online websites or third-party conversion tools.
WAV is an uncompressed audio format that can preserve more audio details. However, the final quality also depends on the quality of the original Apple Music source file.
You may need an audio converter to import M4A files and choose WAV as the output format. Many converters, including Sidify, support M4A to WAV conversion.
Yes. iTunes supports WAV audio files for both playback and library import. WAV files can be added directly to the iTunes library and played without conversion.
To add WAV files to Apple Music on your iPhone, first open iTunes and go to File > Add File to Library. Then select the WAV files saved on your computer and add them to your iTunes library. After syncing your library, the WAV files should appear on your iPhone through Apple Music or iTunes Sync.
What You Will Need
They're Also Downloading

You May Be Interested In
Hot Tutorials
Topics
Tips and Tricks
What We Guarantee

Money Back Guarantee
We offer money back guarantee on all products

Secure Shopping
Personal information protected by SSL Technology

100% Clean and Safe
100% clean programs - All softwares are virus & plugin free